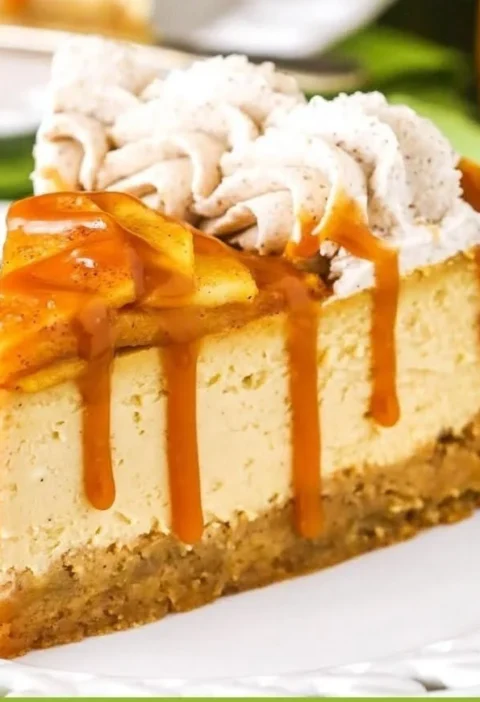
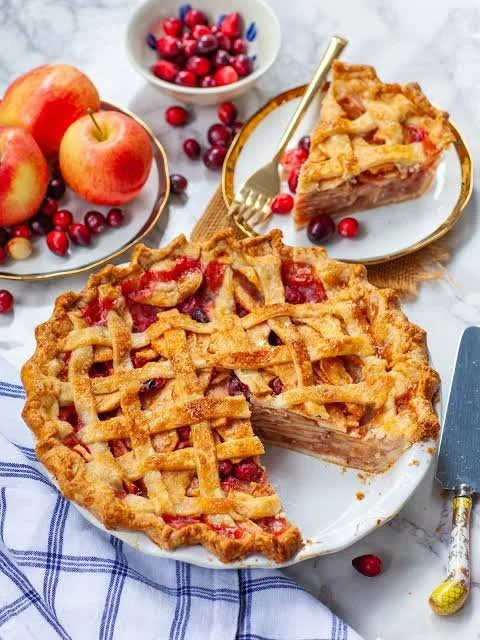
Every home cook should master the classic apple pie. This delightful dessert combines warm, sweet apples, rich spices, and a flaky, buttery crust. With its inviting aroma filling the kitchen, apple pie evokes warmth and nostalgia. Whether served at holiday gatherings or enjoyed on a cozy evening at home, this treat is a staple that brings joy to all.
Why Make This Apple Pie
This apple pie recipe stands out because it balances the sweetness of the apples with the warmth of cinnamon, making each bite a comforting experience. The combination of brown sugar and the hint of lemon juice brightens the flavors and enhances the natural sweetness of the apples. Plus, making your own pie crust allows you to tailor it to your taste, yielding a lovely crispness that store-bought versions simply can’t match. Sharing a slice of homemade apple pie with friends and family is sure to create cherished memories, making this recipe perfect for any occasion.
How to Make Apple Pie
Making apple pie might seem daunting, but it’s straightforward and rewarding. Let’s break it down into manageable steps to ensure a delicious outcome.
Ingredients:
- 1 Perfect Pie Crust Recipe*
- ¼ cup butter
- 8 cups thinly sliced apples** (peeled and cored)
- 2/3 cup lightly packed brown sugar
- 1 tablespoon all-purpose flour
- 2 teaspoons cinnamon
- 1 teaspoon lemon juice
- ¼ teaspoon salt
- 1 egg
- 1 teaspoon water
- Coarse sugar (optional)
Directions:
- Start by setting aside a 9-inch pie plate and preheating your oven to 425°F (220°C).
- In a large pot, melt the butter over medium-low heat. Add the sliced apples, brown sugar, flour, cinnamon, lemon juice, and salt.
- Stir the mixture and cook, ensuring to stir occasionally, until the apples begin to soften, about 8 to 10 minutes. Remove from heat and let it cool slightly.
- While the filling cools, flour a clean work surface and divide your prepared pie dough in half (if it’s not already in two discs). Roll out one disc to about 1/8-inch thick—make it slightly larger than the pie plate.
- Transfer this rolled-out dough into the pie plate, gently pressing it into the bottom and sides.
- In a small bowl, whisk together the egg and water to create an egg wash, and set it aside.
- Pour the cooled apple filling into the prepared crust. Roll out the second disc of dough and place it over the top. If you’re feeling creative, cut it into strips and braid them to create a lattice top!
- If you didn’t use a lattice pattern, be sure to cut vents into the top crust so steam can escape. Trim any excess dough hanging over the sides and crimp the edges to seal the pie.
- Brush the top crust with the egg wash and sprinkle coarse sugar on top if desired for added sweetness and crunch.
- Bake the pie in the preheated oven for 15 minutes, then reduce the temperature to 350°F (175°C) and bake for an additional 40 minutes, or until the crust is golden brown and the apple filling bubbles through the vents. If the crust browns too quickly, place a piece of aluminum foil over it.
- Let the pie cool before serving to allow the filling to set. This pie is best enjoyed warm but can also be served at room temperature.
Nutritional Information
The following information is for one slice of apple pie (assuming 8 slices):
- Calories: 300
- Total Fat: 15g
- Saturated Fat: 7g
- Cholesterol: 45mg
- Sodium: 180mg
- Total Carbohydrates: 42g
- Dietary Fiber: 2g
- Sugars: 15g
- Protein: 2g
How to Serve Apple Pie
Apple pie can be served in many delightful ways. A classic option is à la mode, topped with a scoop of vanilla ice cream, allowing the hot pie to melt the ice cream, creating a delicious mix. Alternatively, serve it with a dollop of whipped cream, or drizzle with caramel sauce for a touch of indulgence. This pie is also great alongside a cup of coffee, enhancing the cozy atmosphere.
How to Store Apple Pie
If you have leftovers (which is rare!), you can store them in the refrigerator. Cover the pie with plastic wrap or foil, and it will stay fresh for about 3 to 4 days. If you want to keep it longer, apple pie can be frozen; just wrap it tightly in plastic wrap and then in aluminum foil. When ready to enjoy, thaw it overnight in the fridge and reheat in the oven.
Expert Tips for Perfect Apple Pie
- Choose firm apples like Granny Smith or Honeycrisp for the best texture and flavor.
- Avoid overcooking the apples on the stovetop; they will cook more during baking.
- Make sure your pie crust is cold before baking to ensure a flaky texture.
- Don’t skip the egg wash; it gives the pie a beautiful golden color.
- Experiment with spices like nutmeg or cloves for added depth of flavor.
Delicious Variations
- Caramel Apple Pie: Add a layer of caramel sauce to the filling for extra sweetness.
- Spiced Nut Apple Pie: Incorporate finely chopped nuts like pecans or walnuts for a nice crunch.
- Dutch Apple Pie: Top with a crumbly streusel topping instead of a full crust for a different approach.
Frequently Asked Questions
-
Can I make apple pie ahead of time?
Yes! You can make the pie a day ahead and store it in the refrigerator. Just give it time to come to room temperature before serving. -
What type of apples are best for pie?
Firm apples like Granny Smith, Honeycrisp, and Braeburn are ideal because they hold their shape and have a pleasant balance of tart and sweet flavors. -
Can I use pre-made pie crust?
Absolutely! If you’re short on time, using a store-bought pie crust is a convenient alternative that still yields a delicious pie.
Conclusion
Making your own apple pie is satisfying and brings a sense of accomplishment. The delicious blend of sweet apples and warm spices is sure to delight anyone who takes a bite. Don’t hesitate to try this recipe; it could become a beloved family tradition. Gather your ingredients, roll up your sleeves, and create this classic dessert that will surely warm hearts and homes! Happy baking!